AutoCorrect: The New Shorthand
If you want to speed up your work and improve the accuracy
of your typing, you might try using Word’s AutoCorrect feature. It can store
and paste up to 255 characters.
To access this function,
Using AutoCorrect in Word 2007
To access this function,
1. Click on the Office button in the upper left corner of
the screen. A screen pops up.
2. Click on Word Options at the bottom right.
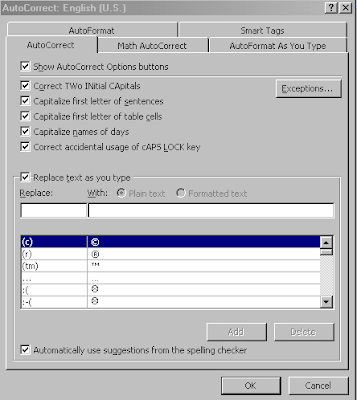
3. From the menu bar on the left, click on Proofing (third option from the top). Then look for the first heading on the page and click on the box labeled "AutoCorrect Options." The AutoCorrect dialog box then appears. Here is a screen shot of the AutoCorrect dialog box, ready for entry of a new item:
To access this function,
1. Go to Tools on the Menu Bar.
2. Drop down to AutoCorrect Options near the bottom of the menu. Here is a screen shot of the AutoCorrect dialog box, ready for entry of a new item:
2. Drop down to AutoCorrect Options near the bottom of the menu. Here is a screen shot of the AutoCorrect dialog box, ready for entry of a new item:
In the center of the screen, look for the Replace box. Type
in the short form of the text you want to make magically appear, for example,
your full name. Here you’ll see “tqm.” Just to the right, in the With box, type
in the long form of the text. Here you’ll see “Timothy Quinn McIndoo.” Click Add.
The box now looks like this:
Now click Add. Then click OK and the dialog box disappears. It’s
as simple as that.
To confirm your entry, open a Word doc and type in the code
followed by the space bar. Voila! Your text appears! Note that you can use both
plain and formatted text. Select either the Plain text button or the Formatted
text button just above the replacement text in the With box.
Finally, don't forget to keep a list of all your entries!
Subscribe to:
Post Comments
(
Atom
)


No comments :
Post a Comment